Personal Project: Among Us Character
Idea
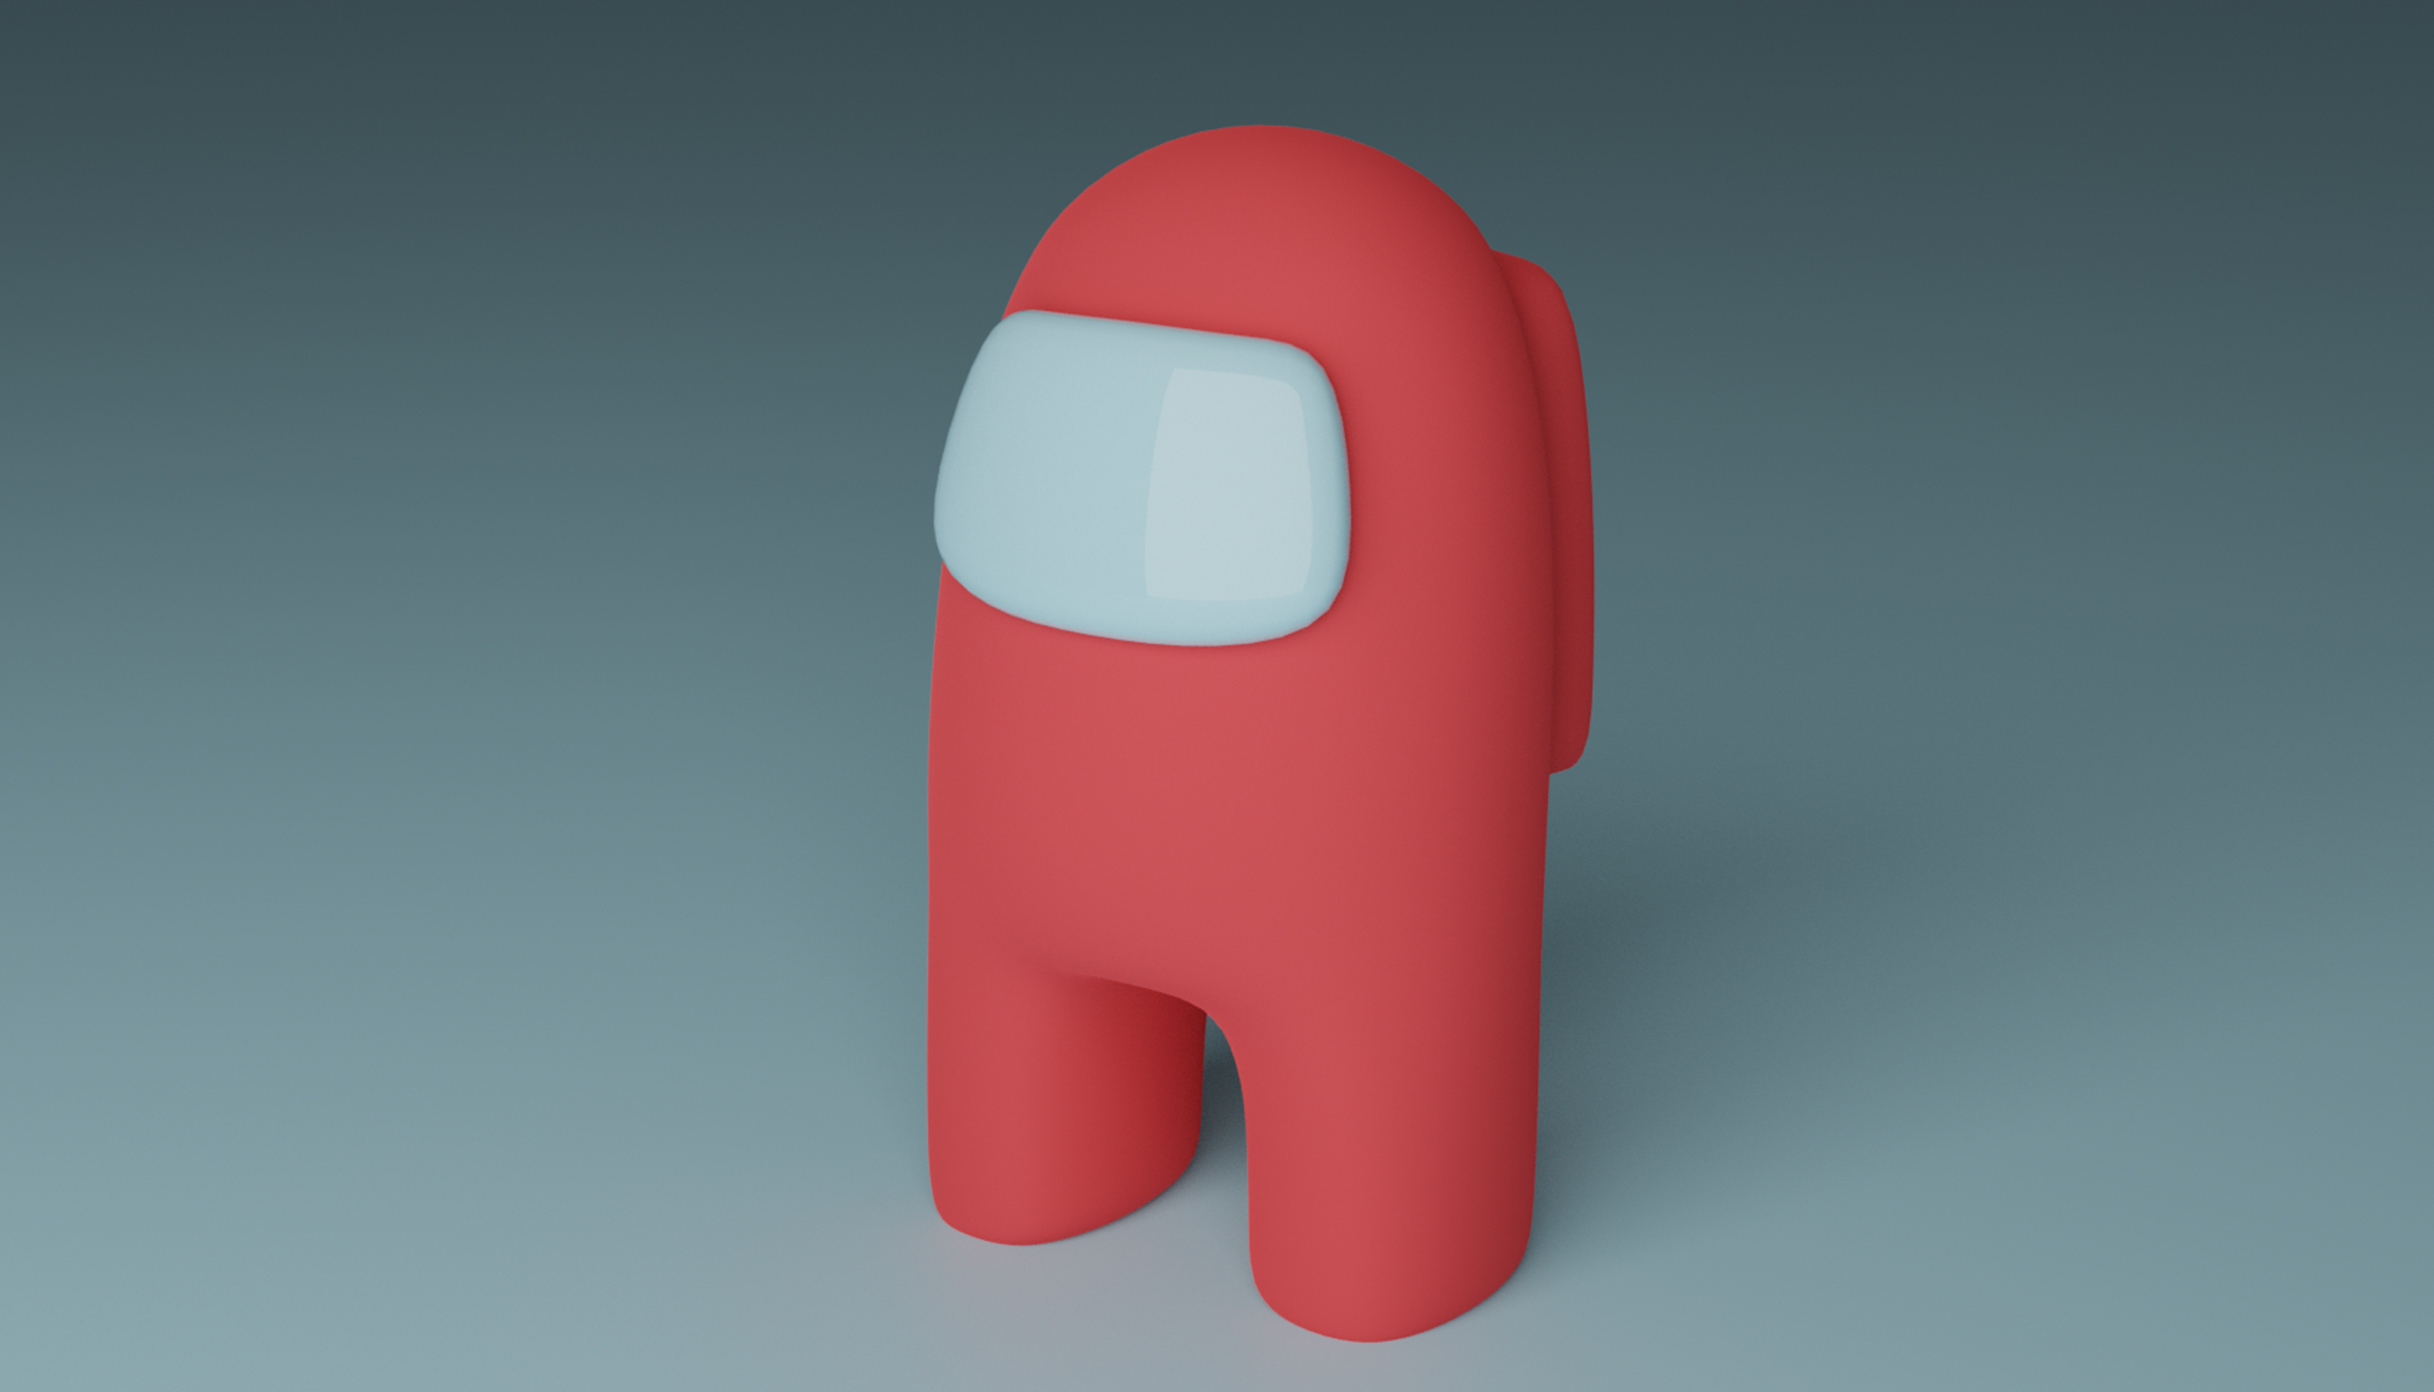
Create a 3D model of an Among Us character. My aim is to keep it simple and learn new ways of modeling along the way.
Character
1.1 Body Modeling Set up
1.2 Body Development
1.3 Colour
1.4 Materials & Scene creation
1.5 Beauty Render
Role in Project
3D Artist
Software
Blender 2.90
1.1 Body Modelling Set up
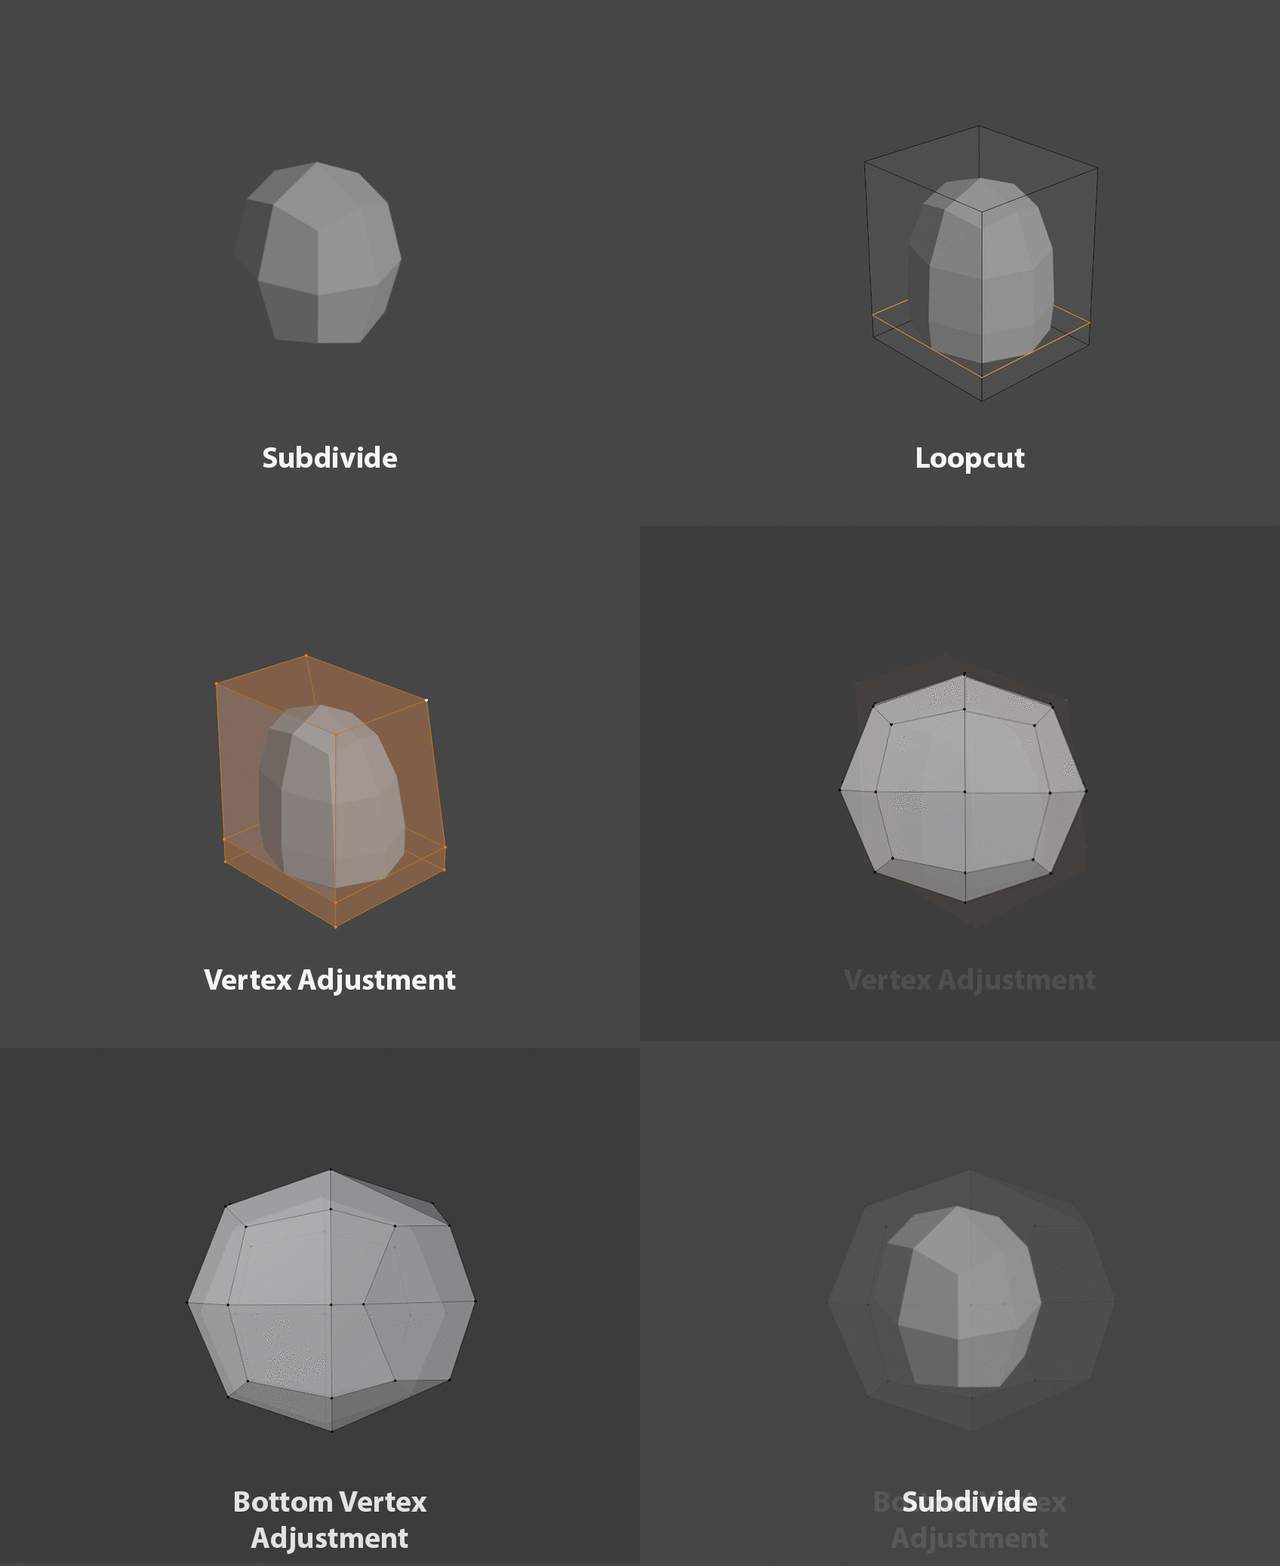
I started by adding a subdivision modifier to a cube, making the shape become more round without too many vertices. Next I used a singular loop cut to help me mould and flatten the button of the shape. I noticed that an among us character has posture, looking up slightly with their whole body. To add this effect, I went into edit mode > vertex view and adjusted 2 vertex points by moving them closer to the body, creating a tilt.
Now the body was ready, I had to add some feet for the character. This was done by more vertex adjustments, moving them around to make a leg shape that I can later extrude. The bottom half was then flattened out by S + axis + 0 (reset rotation to 0 in any axis).
1.2 Body Development
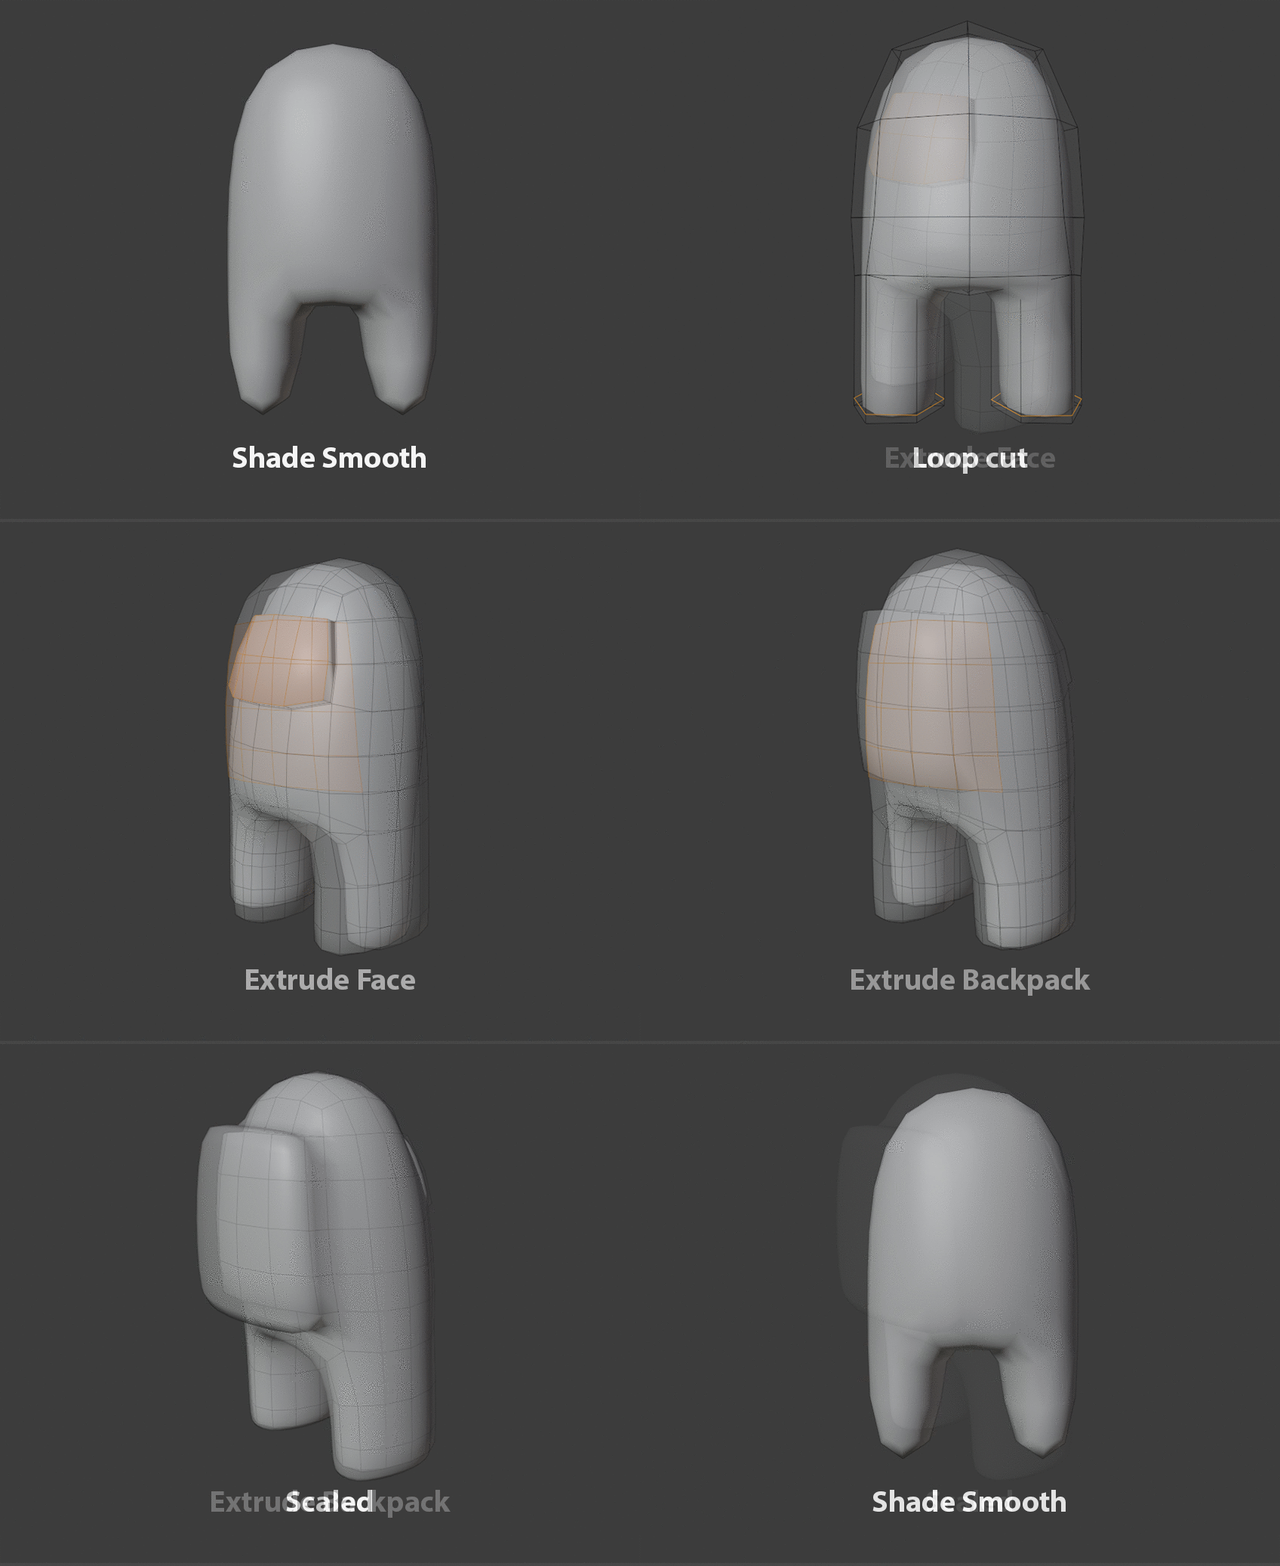
When the character model was ready to be extruded, I deleted the first half of the model and added a mirror modifier. This meant that I was able to copy all vertex adjustments for both sides, whilst not having to worry about things not look equal.
After extruded the legs and shaded smooth, the character started to look more like a tooth than anything else. I started by adding a loop cut for the feet, only having to work on one leg, and flattened it down. This have me a pretty decent model of the general character. Once again, I rearranged some vertexes on the characters faces to create a roundish guggle shape, to which later is extruded.
Finally, to create the backpack, I selected a 4 by 4 area of the back and extruded it. After the first extrude, I wasn’t satisfied with the shape of the backpack as it was too small. This was solved by selecting all the faces of the backpack and scaling it up, giving more depth.
1.3 Colour & Materials
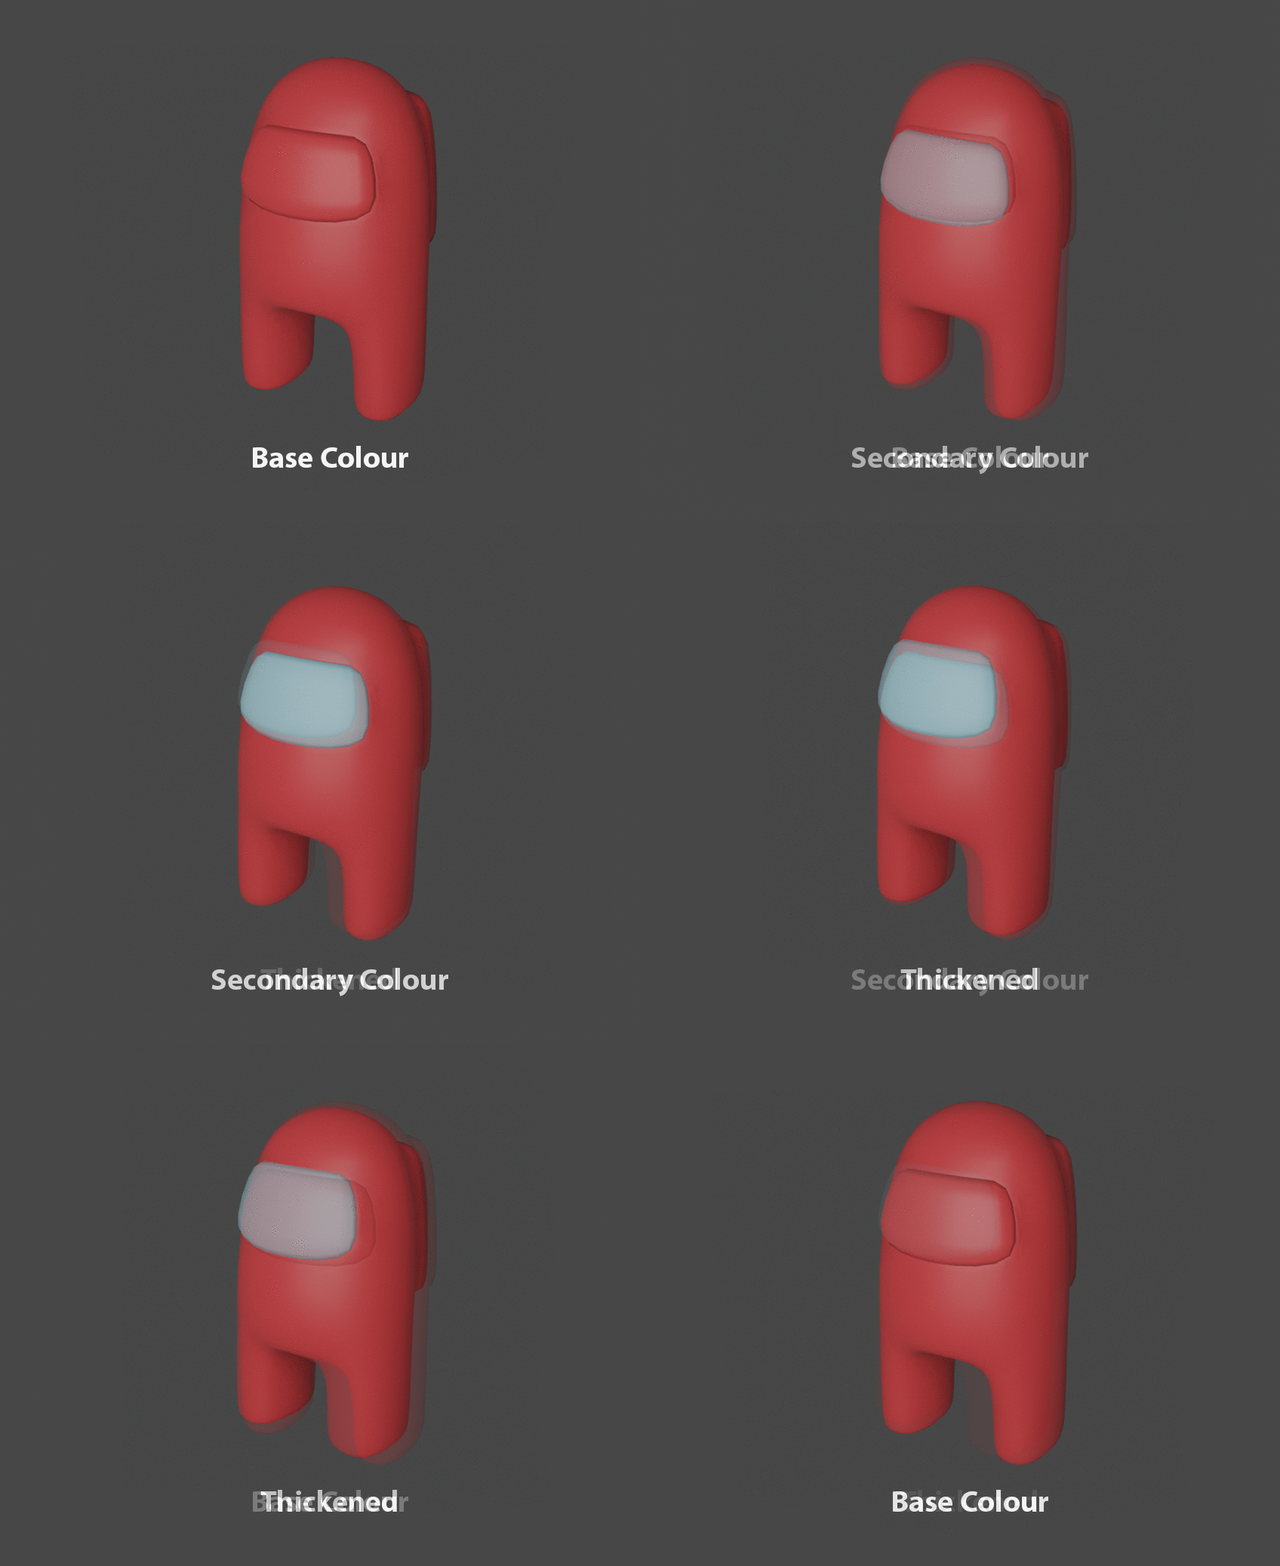
Once the body was complete, I began applying colours and materials on the character. The character consists of only 2 colours, red as the base colour, and blue as the secondary.
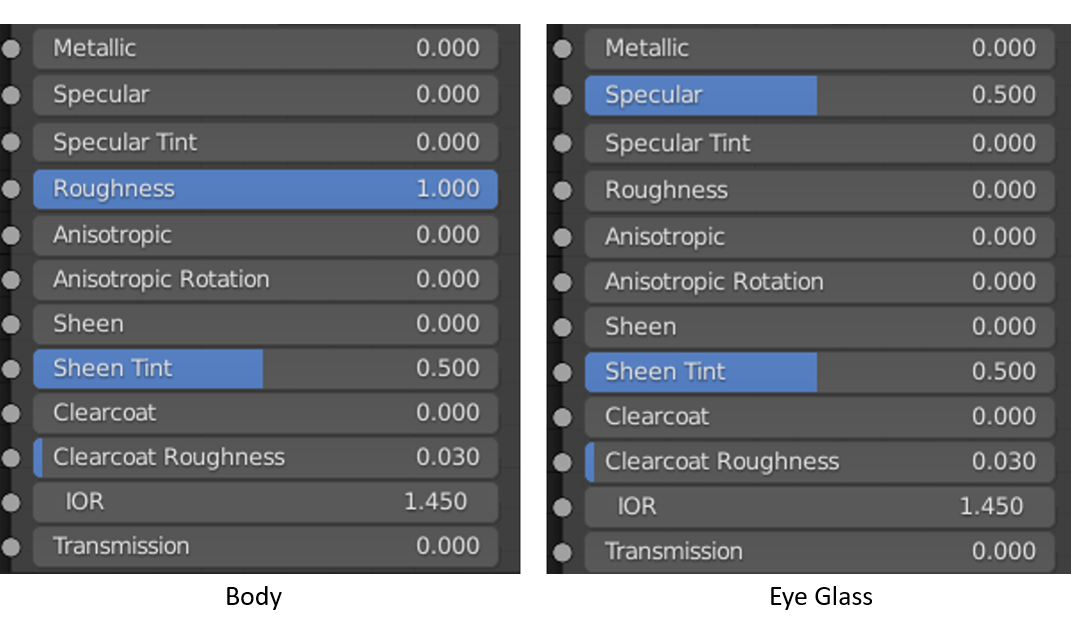
Later, I began editing the materials of each colour. I wanted the body to have no reflection of light, looking more like play dough. This led me to increase the roughness to 100% and decrease the specular to 0. The opposite procedure was taken place for the eye glass, decreasing the roughness to 0 and keeping the specular at half, making it seem like glass.
Finally, I made a final adjustment of thickening the character, focusing on the legs as I thought they seemed to slim.
1.4 Scene creation
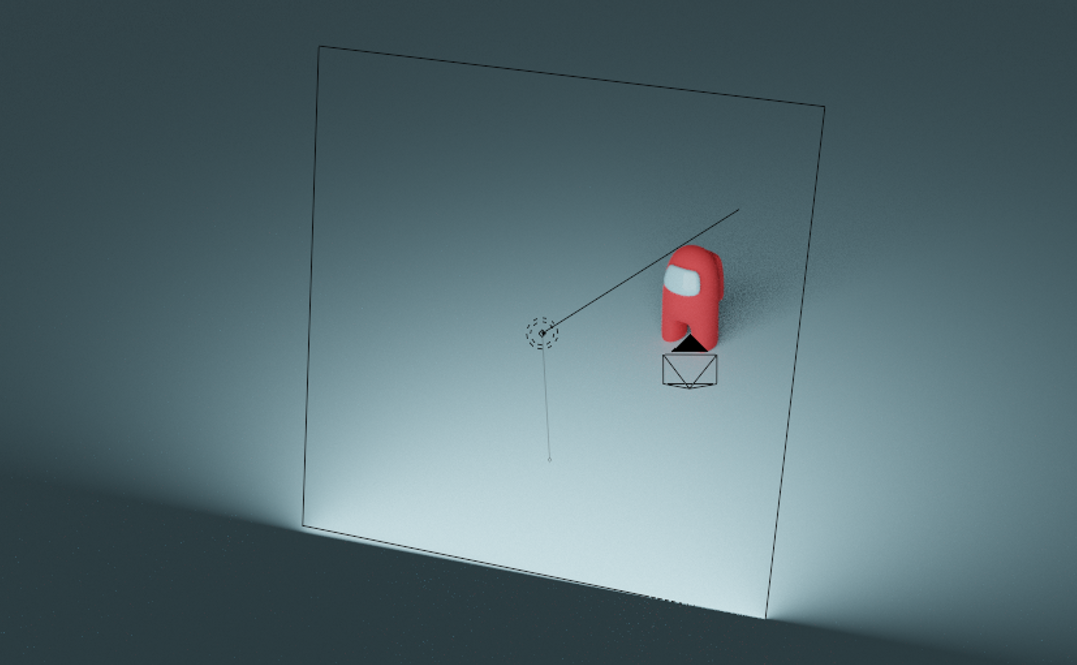
The Scene was kept minimal, aiming to create an enigma. I used an area light as the main light source. I chose light source as it allowed me to send light in a certain direction that fit within a large area, having light fill the main area of the character and slowly descend into the distance.
The positioning of the light also allowed me to utilize the eye glass by adding a reflection, giving a better visual display on the material.
1.5 Beauty Render
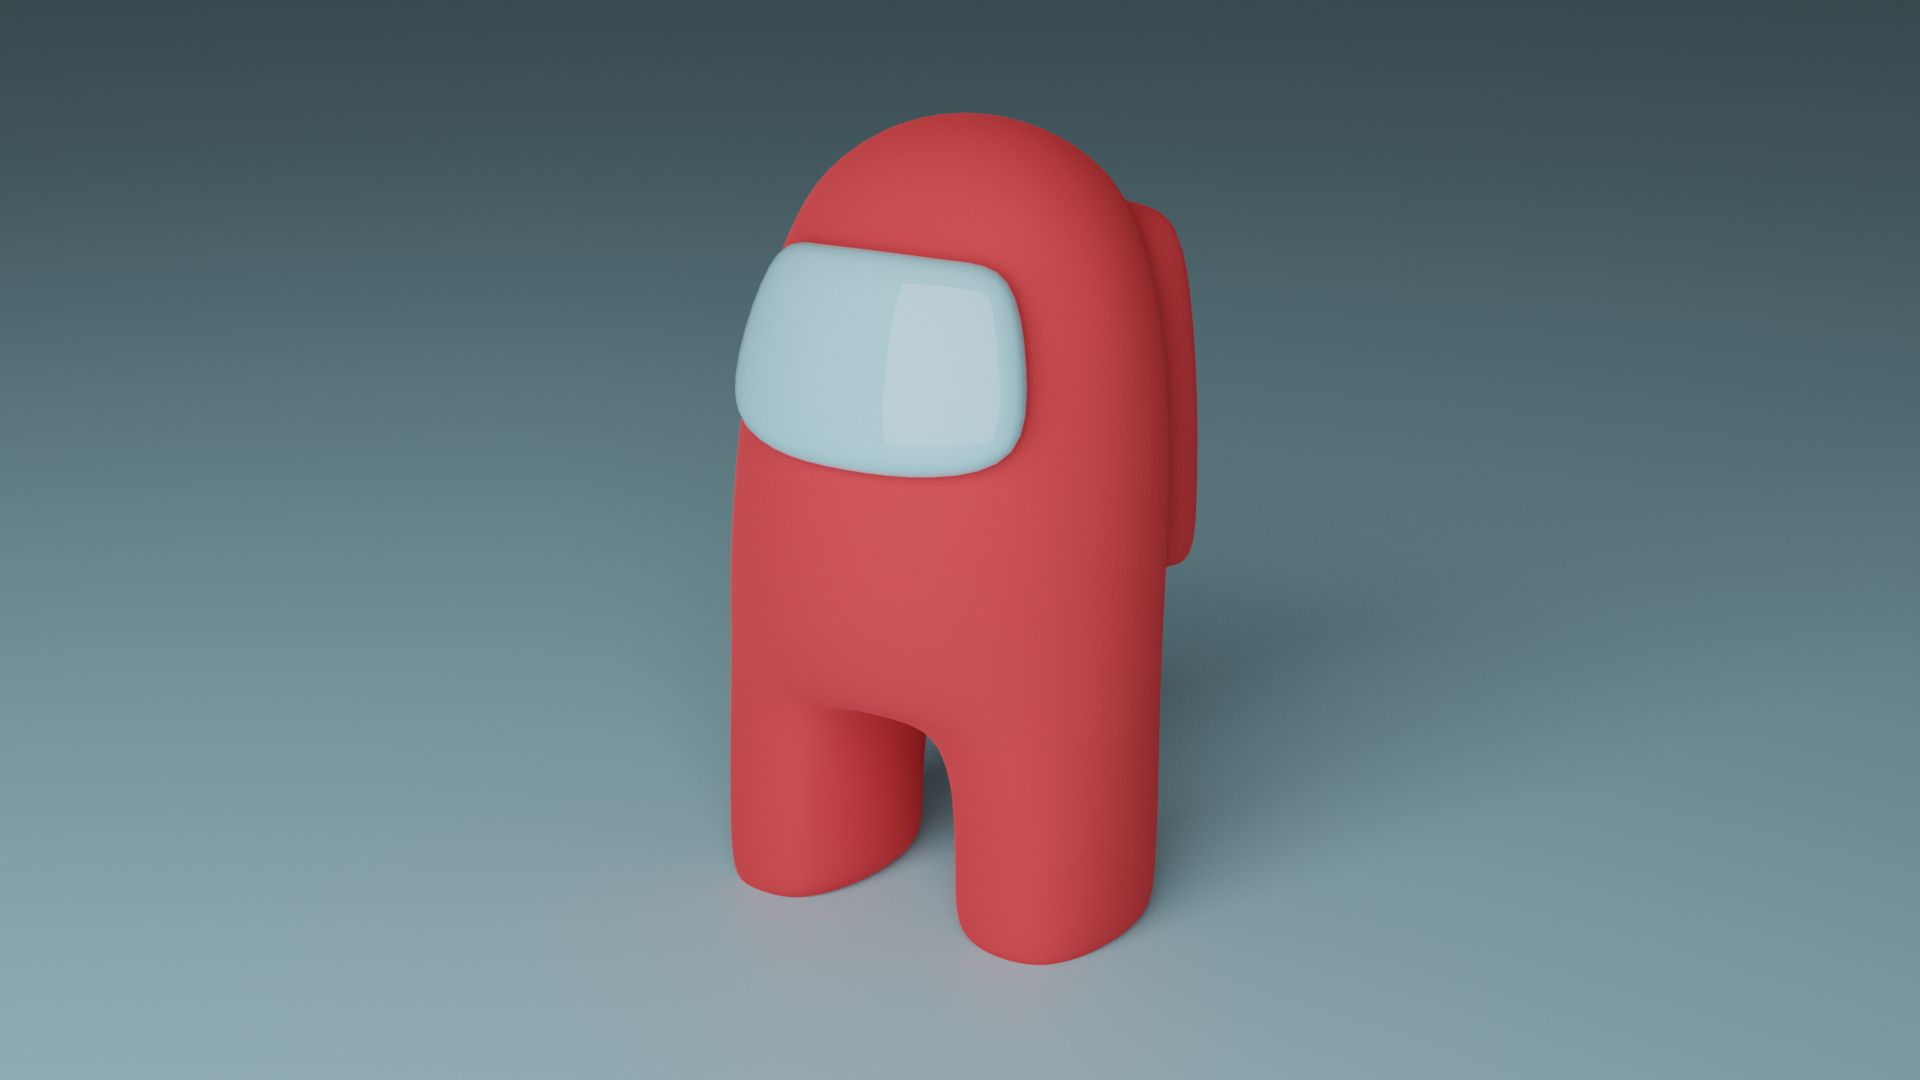
Overall, I am more than thrilled on the outcome of the character. I’ve learnt a few new things about the ways of modelling from a subdivided cube and how subtle alterations of vertexes can be very useful and time saving!